I have a 500 gig Western digital MyBook external drive. One day I hooked it up to my computer and it would not power up (for the purposes of this post, the background as to why it might not boot up is irrelevant ;-)). Horror! Of course I didn’t have everything backed up – time to start saving money for a second 500 gig drive I guess. Western Digital sent me a replacement drive but told me that my data was lost unless I wanted to talk to their data recovery department and that it would most likely be costly. After reading a bit on the ‘net, common opinion was the power or USB on the MyBook was likely the cause – that these elements were not as robust as the drive itself. After a little more research and some playing I did manage to disassemble the MyBook, recover my data, and return it to Western Digital (as pristine as possible so hopefully I did not obviously void any warranties – which would be ridiculous since I just wanted *MY* data back from *THEIR* broken drive).
Here’s what I was looking for on the ‘net and did not find. Hope this helps someone else. Click any of the images for a larger image.
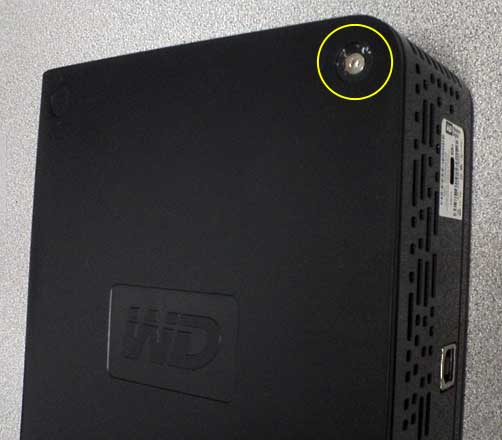
(1) There is a black sticker covering one screw securing the case. Remove this sticker (mine was more like black paint that chipped off) and remove this screw.
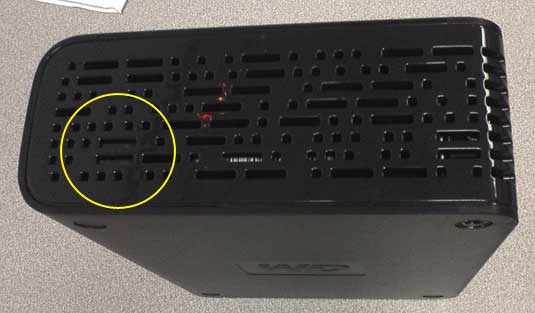
(2) On both the top and bottom of the drive there are plastic “catches” that must be pressed in to allow you to slide the outer case off the drive. See the next picture for a clear view of the “catches” with the case off. It may be tricky getting both sides pressed in at the same time to slide off the case. On my drive, I used a flat-head screwdriver to push one side in and a little to the side to lodge it just a little under the plastic case so it would stop popping back up again. Be careful not to push in too far and break the “catches” off.
(3) Slide the case off. In truth, easier said than done so don’t cuss me out when you try it. I had to use my fingernails and pry the edges of the solid black case away from the drive unit and just keep carefully working at it until I could get it to start coming apart. When you’re doing it, you’ll see what I’m talking about.
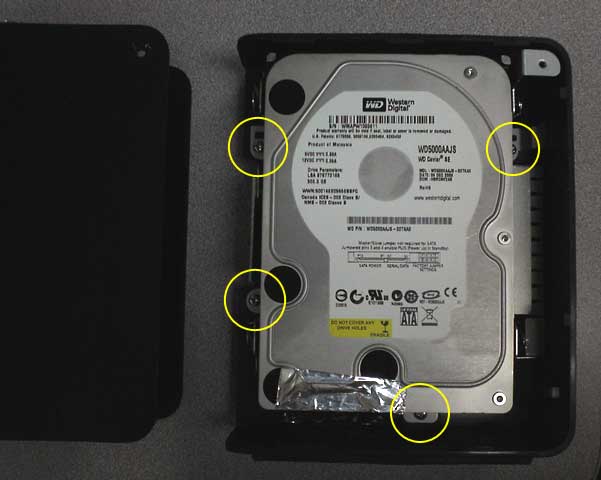
(4) Remove four screws securing the drive unit to the inner case.
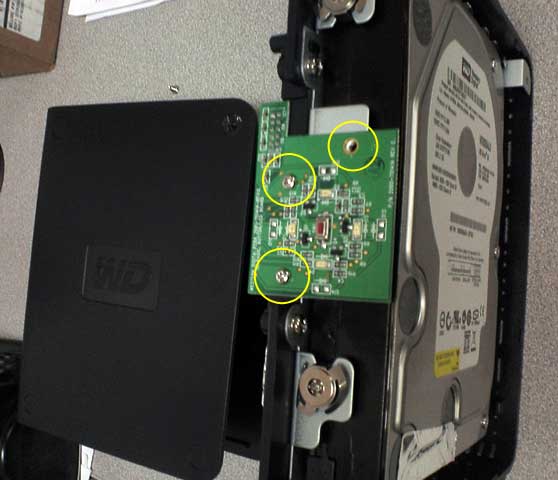
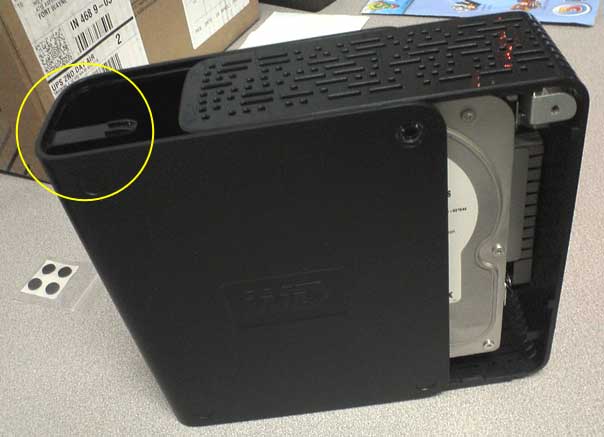
(5) There is a small circuit board attached for the LED power light that you need to remove to make the drive easier to get out of the case. Remove the three screws holding it on and gently unplug it from it’s connection on the drive unit.
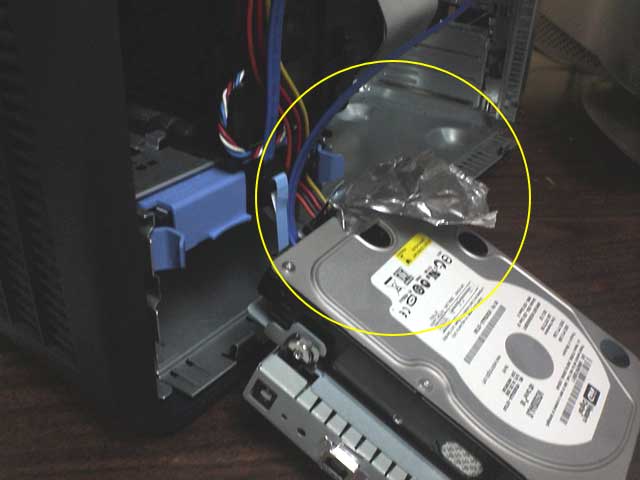
(6) Peel back the foil tape so that you can access the power and data connector on the drive. Unplug the connector attached to the drive. This is a SATA hard drive and can be hooked up to a desktop computer (that accepts SATA drives) or I’ve seen adaptors on the ‘net that you can plug into a SATA drive to turn it into a regular IDE drive (not exactly something most people have laying about though). I happened to have a DELL Optiplex in the office that uses SATA drives so I opened it up and hooked the second power connector coming off the main drive to my newly freed MyBook drive. I still needed a SATA cable so I “borrowed” one from another office computer to connect the drive to the motherboard. If you are unfamiliar with all this, just look at how the main drive is hooked up – it’s not rocket science.
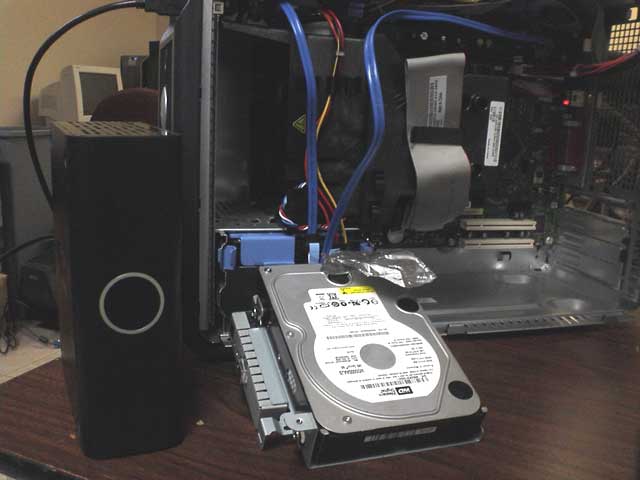
(7) On my DELL Optiplex I had to go into setup when the computer started and enable the second SATA drive. Okay, I didn’t know to do this right off – the drive just didn’t show up and after scratching my head for a few minutes I rebooted and checked setup. After this everything showed up fine – there was ALL my pretty data. I attached my new MyBook and moved everything over. Note – over 350 gig of data takes a while to transfer.
For the curious, all pics were taken with my Verizon LG8000 cellphone and quickly edited in Photoshop.